Do you ever worry about losing your precious memories stored in iCloud? Perhaps you’d like to have them readily available on your computer for easier editing or to create a physical backup. Whatever your reason, this guide on How to Download All Photos From iCloud is here to make downloading all your iCloud photos.
We’ll break down the process into simple steps, accompanied by clear pictures to help you navigate every click. Forget confusing tech talk, this guide uses straightforward language to empower you to take control of your photos.
In no time, you’ll have a secure copy of your favorite moments stored locally on your device, giving you peace of mind and the freedom to manage your photos exactly how you want.
Table of Contents
How to download your photos from the iCloud web
No problem, here’s a guide on downloading photos from iCloud using the web browser, incorporating additional options and considerations:
Downloading iCloud Photos via Web Browser:
1. Access iCloud.com:
Open a web browser and navigate to iCloud.com. Sign in using your Apple ID and password.
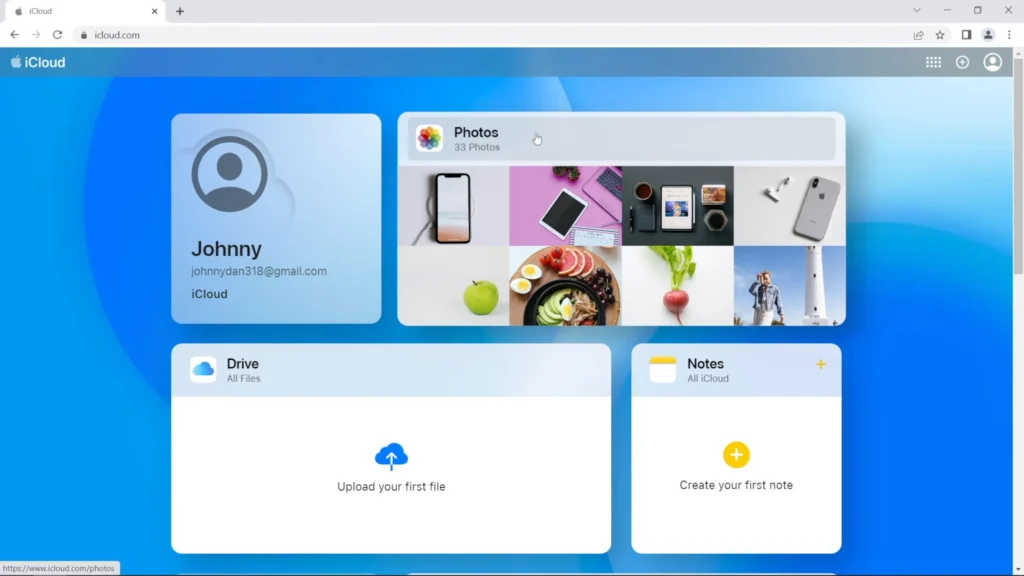
2. Launch Photos App:
Locate the “Photos” icon and click on it to launch the iCloud Photos web app.
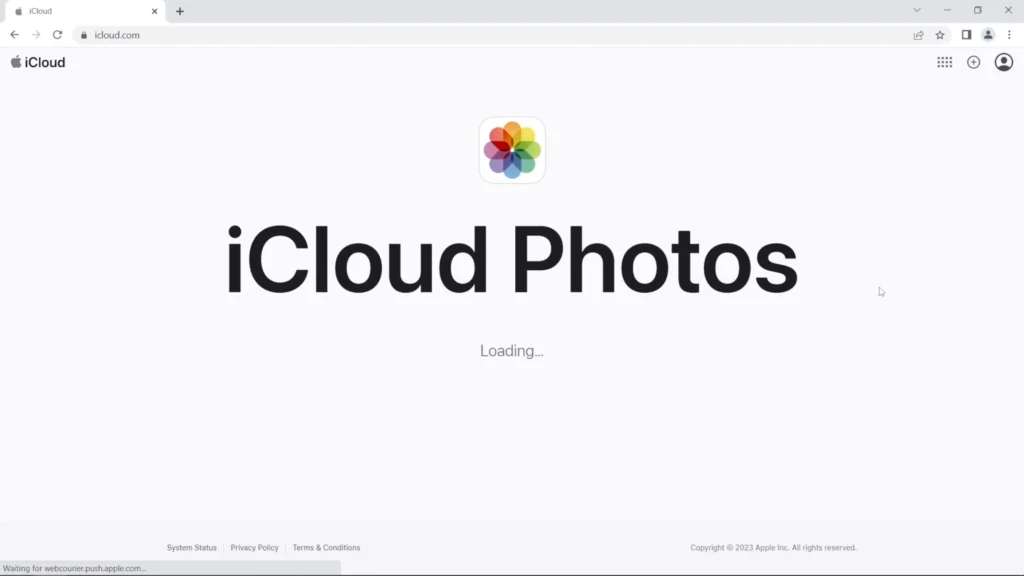
3. Find and Select Photos:
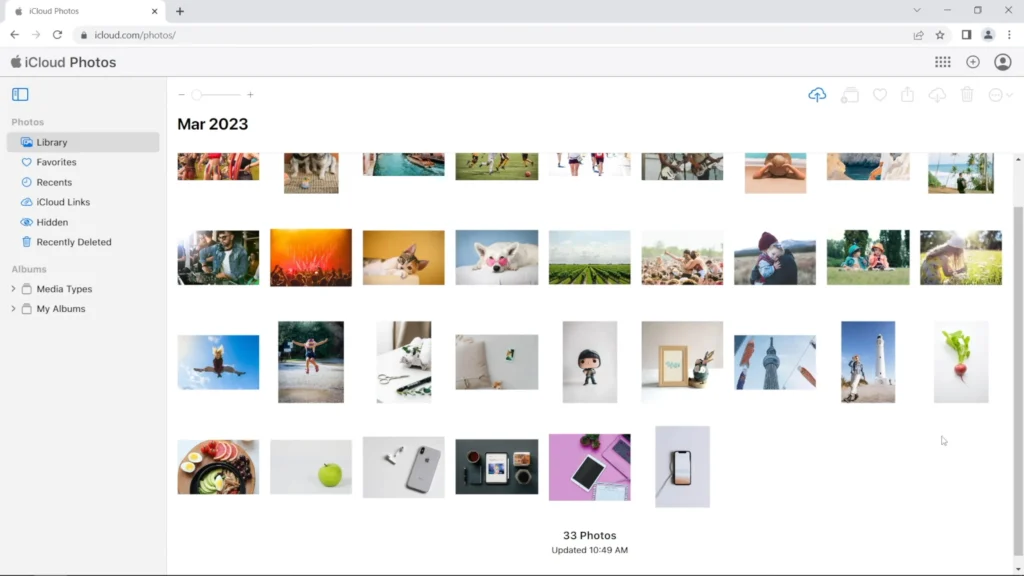
Explore your photo library using various methods:
- Browse by Time: Navigate through your photos chronologically by year or moments.
- Utilize Albums: Existing albums can help you find photos grouped by event, theme, or creation date.
- Leverage Search: If you have a specific photo in mind, utilize the search bar to find it by filename, location data (if enabled), or keywords in the image title.
4. Select Photos for Download:
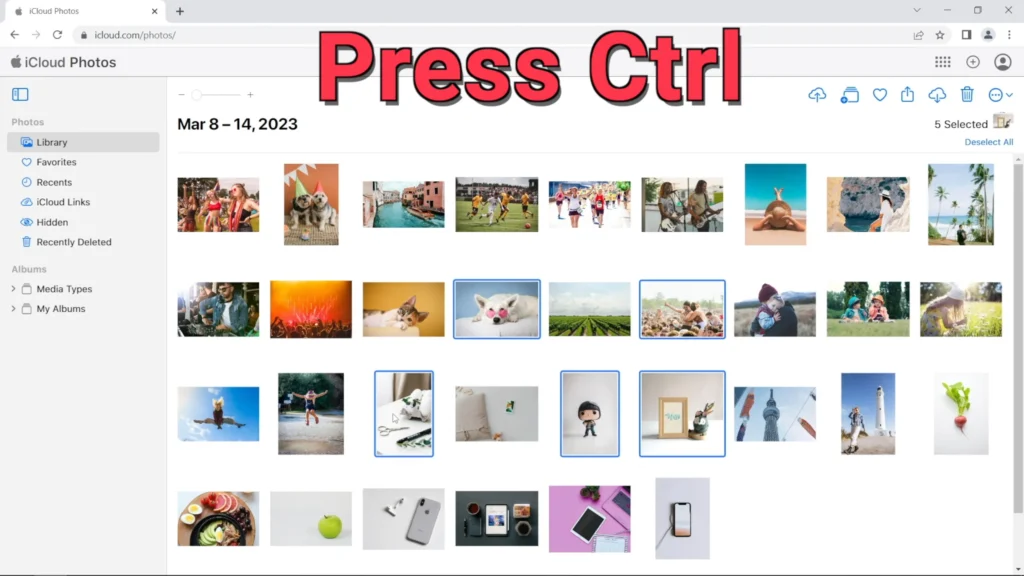
Click on a photo to select it. For multiple photos, hold down the “Shift” key and click on each desired photo. Alternatively, use the “Command” key (for Mac) or “Ctrl” key (for Windows) while clicking photos for multiple selections.
Keep an eye on the counter in the top right corner, which displays the number of selected photos. The maximum number of photos downloadable in a single batch is 1,000.
5. Choose Download Options:

Click the download icon (downward-pointing arrow) in the top right corner once you’ve selected your photos. Here, you’ll encounter two download format options:
- Most Compatible (Default): This option prioritizes compatibility across various devices and ensures you can view the downloaded photos on most platforms.
- Unmodified Originals: Selecting this option downloads the photos in their original format, preserving any edits and maintaining the highest quality. This might be preferable if you plan to edit the photos further or require the uncompressed versions.
6. Initiate Download and Manage Files:

Your browser will likely prompt you to choose a specific location on your computer to save the downloaded photo. If you don’t specify a location, they’ll be saved in your default download folder. The download will commence, and the photos will be saved in your chosen format.
7. Handling Large Collections:
If your iCloud Photos library is extensive, you might exceed the 1,000-photo limit per download. In this scenario, repeat steps 3-6 by selecting batches of 1,000 photos or less at a time until your entire library is downloaded.
By following these comprehensive steps, you can efficiently download photos from iCloud to your computer using the web interface. Remember to choose the download format that best suits your needs based on compatibility or maintaining the original quality.
Also Read: How To Get LinkedIn Premium For Free: Boost Your Network
How to download all photos from iCloud using your device (iPhone/iPad)
This method lets you download your full-resolution iCloud photos directly to your iPhone or iPad. Here’s a breakdown of the steps:
1. Check iCloud Storage:
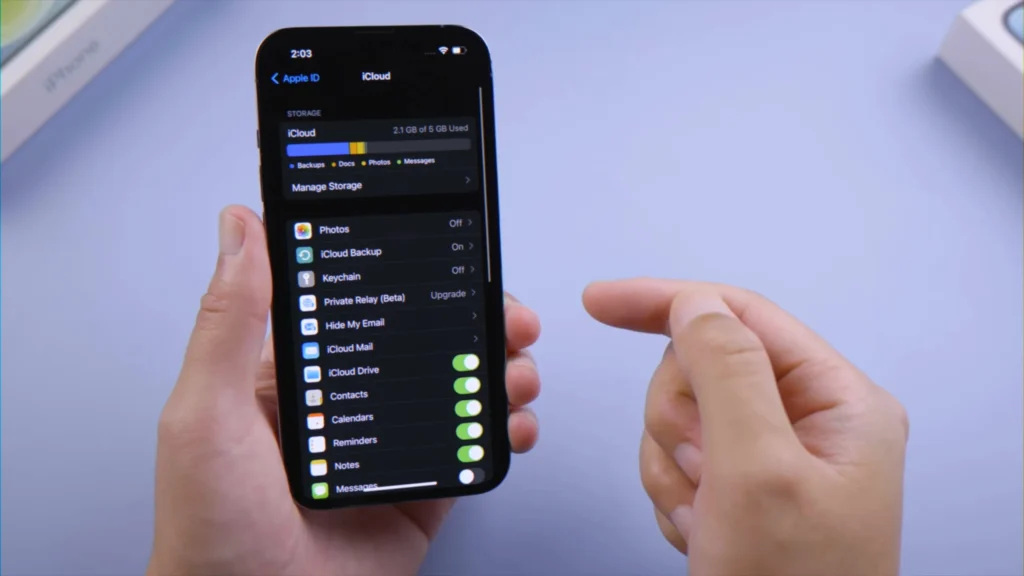
- Open the Settings app on your iPhone or iPad.
- Tap on your Apple ID at the top.
- Select iCloud.
- Check the storage bar to see how much space your photos and videos are using. Ensure you have enough free space on your device to accommodate all your photos.
2. Enable iCloud Photos Download:
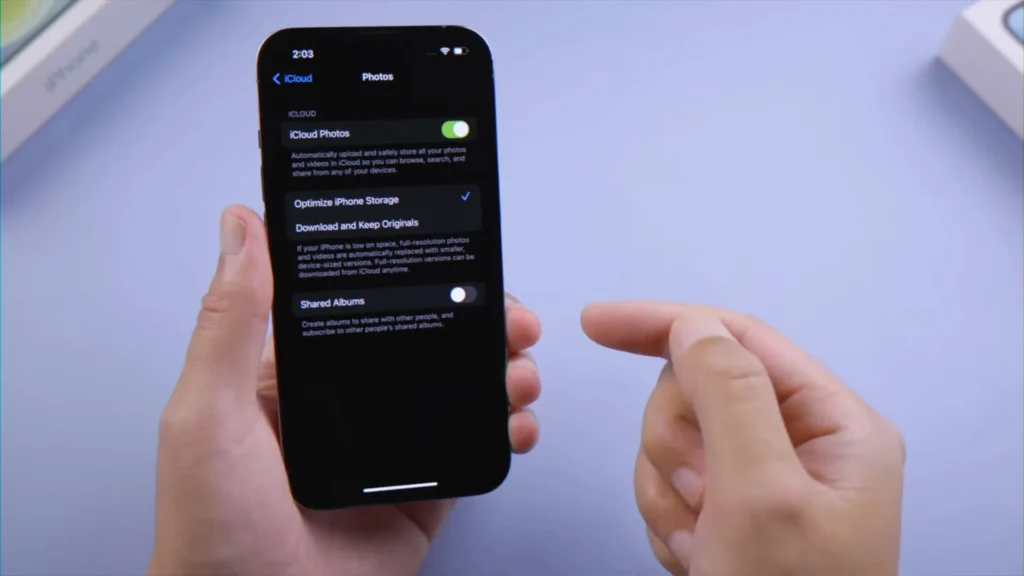
- Go back to Settings.
- Tap on Photos.
- Under the Cellular Data and Wi-Fi sections, toggle Download Originals to ON. This instructs your device to download the full-resolution versions of your photos.
3. Initiate Download (Optional):
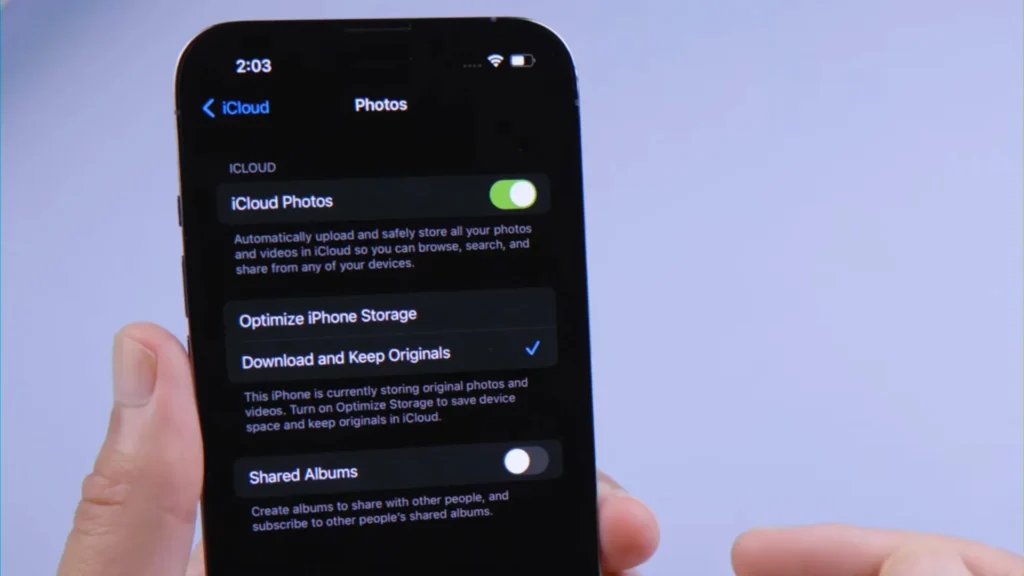
- While enabling “Download Originals” automatically starts downloading photos you haven’t viewed recently, it might take time for a vast library.
- To prioritize downloading all photos immediately, connect your device to a strong Wi-Fi network and plug it into power.
4. Access Downloaded Photos:
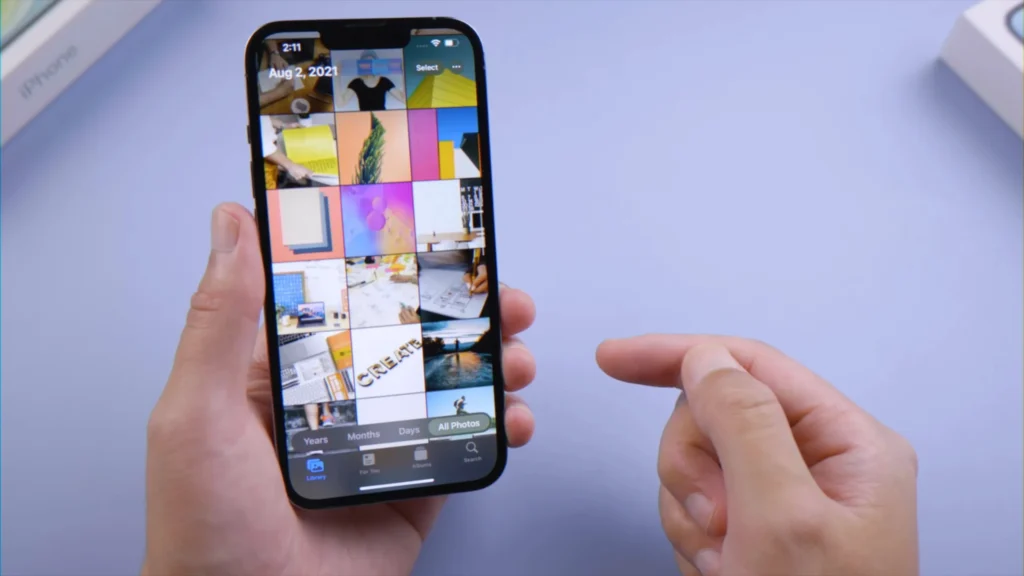
Once downloaded, your photos will be accessible within the Photos app on your iPhone or iPad.
5. Transfer to Computer (Optional):
After downloading photos to your device, you can transfer them to your computer for further organization or backup. Transfering them to your computer can be done through various methods like:
- Connecting your device to your computer with a cable and using the built-in photo transfer function (varies by the operating system).
- Utilizing cloud storage services like Google Drive or Dropbox to upload photos from your device and download them on your computer.
Important Considerations:
- This method downloads photos directly to your device, so ensure you have sufficient storage space.
- Downloading a large number of photos can take time, especially over cellular data. It’s recommended to use a strong Wi-Fi connection.
- Once downloaded, you can manage your device storage by deleting photos from iCloud if you have them saved locally.
Alternative:
While enabling “Download Originals” downloads full-resolution photos, you can also choose “Optimize iPhone Storage” under iCloud Photos settings. This option stores space-saving versions on your device and downloads the originals only when you need to edit or view them at full quality.
Also Read: How To Get YouTube Music Premium For Free: Enjoy Free
Should you use iCloud to keep your photos?
There are pros and cons to consider when deciding whether to use iCloud to keep your photos. Here’s a breakdown of the pros and cons of using iCloud to help you make an informed choice:
Pros of Using iCloud Photos:
- Convenience and Accessibility: Access your photos from any Apple device or web browser with an internet connection.
- Automatic Backups: Photos are automatically uploaded and backed up to iCloud, offering protection against device loss or damage.
- Space-Saving Options: Choose to optimize storage on your device by keeping smaller versions of photos while full-resolution copies remain in iCloud.
- Organization and Sharing: iCloud Photos helps organize your library and allows easy sharing with friends and family.
Cons of Using iCloud Photos:
- Storage Limitations: Free iCloud storage only offers 5GB, which fills up quickly with photos. Paid storage plans are required for larger libraries.
- Reliance on Internet Connection: Uploading, downloading, and accessing photos require a stable internet connection.
- Privacy Concerns: Storing photos on someone else’s servers might raise privacy concerns for some users.
- Download Challenges: Downloading all photos can be time-consuming and requires managing multiple files, especially for large libraries.
Here are some additional factors to consider:
- The size of your photo library: If you have a vast collection, iCloud’s free tier might not suffice, making paid storage a recurring cost.
- Your comfort level with cloud storage: If you prefer complete control over your photos and are wary of cloud storage, iCloud Photos might not be the best fit.
- Alternative backup options: Consider if you have a reliable local backup plan, like an external hard drive, to complement iCloud storage.
Ultimately, the decision to use iCloud depends on your individual needs and priorities. If you value convenience, automatic backups, and accessibility across devices, and your photo library isn’t massive, iCloud Photos can be a great solution.
However, if you have a large collection, prioritize complete control over your data, or have limited internet access, exploring alternative storage options might be preferable.
Also Read: How To Get Grammarly Premium For Free: 4 Easy Ways
FAQs: Downloading All Photos From iCloud
This FAQ section addresses some common questions you might have after reading the guide on downloading all your photos from iCloud:
Q1: How long will it take to download all my photos?
A: The download time of your all photos depends on several factors:
- Number of Photos: A larger library will naturally take longer.
- Internet Speed: A strong Wi-Fi connection significantly accelerates downloads compared to cellular data.
- Photo Resolution: Downloading full-resolution originals takes longer than space-saving versions.
Q2: Can I download specific albums instead of everything?
A: Unfortunately, the web browser method doesn’t offer selective album downloads. However, you can achieve this using your iPhone/iPad:
- Open the Photos app.
- Select the desired album.
- Tap “Select” in the top right corner.
- Choose the photos you want to download (tap each photo).
- Tap the share button (square with an arrow pointing upwards).
- Select “Save [number] Photos” to download them to your device.
Q3: What happens to my photos in iCloud after I download them?
A: Downloading photos doesn’t remove them from iCloud by default. They remain in your iCloud storage unless you choose to delete them there to free up space.
Q4: I don’t have enough space on my device to download everything. What are my options?
A: There are a couple of approaches:
- Optimize Storage on Device: In the Photos settings on your iPhone/iPad, choose “Optimize iPhone Storage” to download smaller versions. You can still access full-resolution copies when needed.
- Transfer Photos in Batches: Download smaller batches of photos to your computer and free up space on your device before downloading more.
Q5: Can I download photos to an external hard drive instead of my computer?
A: While directly downloading from iCloud to an external drive isn’t possible, you can download them to your computer first and then transfer them to the external hard drive using a USB cable.
